Thursday, February 26, 2015

DIY Removing & Replacing Rear Struts 2000 Toyota Camry

This is a DIY for rear struts on a 2000 Toyota Camry


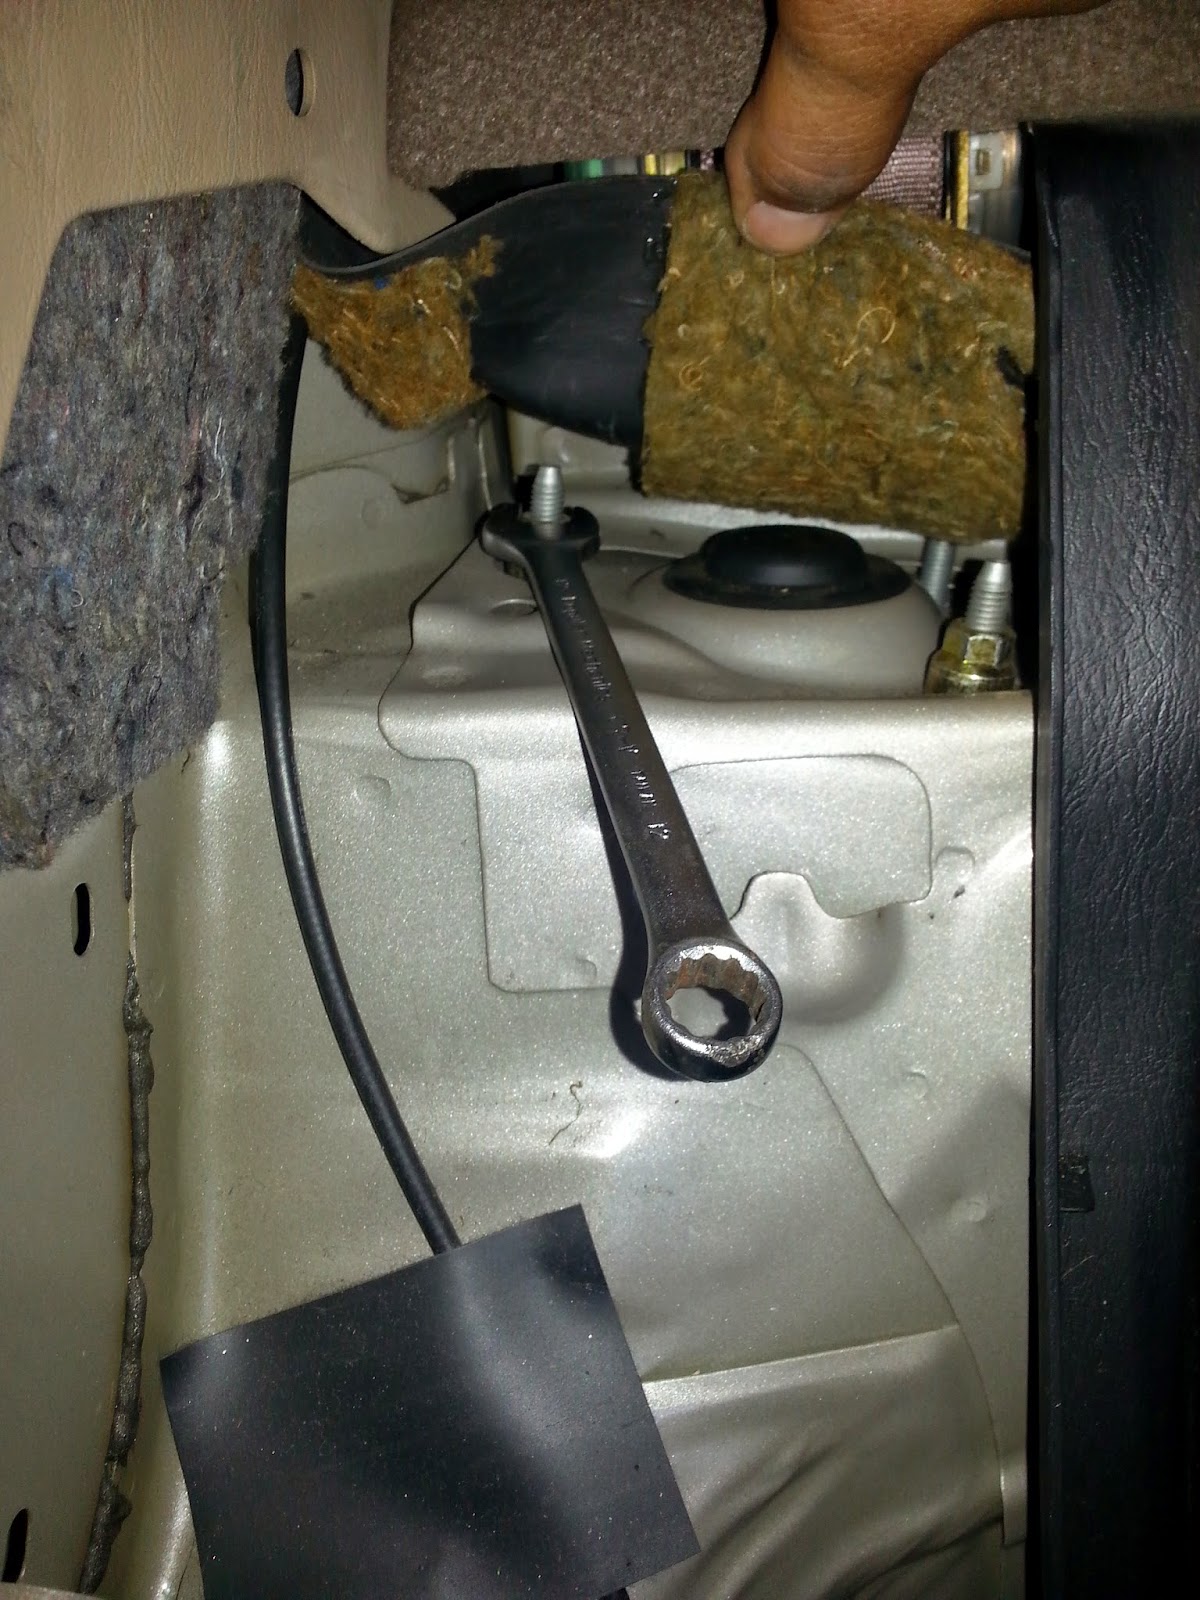
First you have to remove the bottom portion of the rear seat and then remove the side corners ONLY if you have fold down seats . If you DO NOT have fold down seats you have to remove the entire back seat . This is how you get to the rear strut mounts .


Remove the bolt for the brake line and the rear ABS wire .
 
 
Then from there you loosen the strut bottom bolts only removing the nuts


Then remove the rear sway bar links
 
 
Once you remove everything above in the photos either place the tire or a block and this is to prevent the rear drum to drop and ripping apart the ABS wire cause the drum will go to almost near the floor . One you secure that then you can remove the bolts that hold the bottom strut
 

 Then from there you can remove the top nuts for the strut mount and then the strut will drop on the support rear area .


What I found out about this DIY is that the rear springs aren't as difficult to remove with out a spring compressor tool . But if you don't feel safe use one . In my situation I didn't need one and when I put the spring on the new strut I hand pushed it down to put the top nut on .
 
Remember if using the old strut mounts that the painted point faces towards the direction as the bolts would go in on the bottom of the strut
 
In the last photo you will see a big fat spacer that needs to go on before the nut goes on the top of the strut .


 Once you have the spring secured on your new rear strut then you can reverse the way you took it off and start putting your struts back .
 
In my case I replaced the sway bar links .


.


Friday, February 20, 2015

DIY - Toyota Camry Front Strut Replacement

This is a DIY on a 2000 Toyota Camry - Removing and Replacing Front Struts , Strut Mounts and Sway Bar Links .


If your gonna remove the struts you might as well replace the sway bar links and strut mounts at the same time .
 
Make sure you use the proper tools - for example use spring compressor to ensure no injury .
 
Make sure you use jack stands .


As you can see those are the original struts and strut mounts , The dot on the strut mounts indicates the way that the high point should be facing when replacing the old ones with the new ones .


Remove the brake line then there is a ABS wire that you carefully unclip from the strut , then from there you remove the sway bar link .


Then with a impact wrench you can loosen the bolts that hold the strut to the spindle . Do not remove the bolts out completely .


Remember if you do not have a dot to mark the area either scratch a mark or with some kind of paint pen put a mark there , so that if your using the old strut mounts you know how they should be facing when you install them or when you install the new ones you know where to mark those , This is very important because there on  angle and you can put them back wrong .


 In this photo above I etched the bottom part of the base that is under the strut mount and you will be reusing that , they must both be facing the same way .


 Then by using the spring compressor to remove the old spring , Compress the spring then remove the center bolt holding the strut then putting the old spring on the new strut still compressed then putting the bump stops and the dust cover back on before installing the top plate and strut mount , Again etching the strut plate and mount facing towards the same direction as the bottom bolts then you can tighten center nut then release the spring .

As you can notice the mount has a angle .


Then you can install the new strut the same way you removed the old ones . In many situations you do not need a alignment because you aren't removing the outer tie rod but it is best you do a alignment due to camber reasons or at least have it checked out .


More DIY at www.COROLLACARCLUB.PROBOARDS.com


.

Tuesday, February 10, 2015

DIY - Replacing Lower Control Arms & Sway Bar Links 2000 Infiniti I300

This is a DIY on how to remove and replace lower control arms and front sway bar links for a 2000 Infiniti I30


You DO NOT have to remove the outer tie rod when you do this DIY , Start off by removing the sway bar links from the top .
 
 
In the photo above you can start by removing the ball joints first in the yellow arrow ( Details below on how to remove that part ) Then you can loosen the nut where the green arrow is showing , From there you can remove the red and pink arrow bolts . Then once you have it off you can finish taking off the green nut from the bracket to slide in the new lower control arm .


I used a ball joint separator as photo above .
 
 
This is where in the photo above the green arrow was pointed , The driver side has no room to remove it all the way that's why I recommend you loosen that nut this was while the bracket is still braced to the frame you can have torque .


Once you remove everything then you can put the parts back on the same way you have taken it off . If you haven't had a alignment go out and get one but none is needed for this DIY .
 
Parts where purchased from eBay at a great deal for lower control arm , sway bar links and outer tie rod , But I didn't need the outer tie rod at this time .


.

DIY - Removing & Replacing a Power Steering Hose 2000 Infiniti I30

This is a DIY on a 2000 Infiniti I30 on how to remove and replace a power steering pressure hose .


This hose is located on the passenger side by the back of the motor near the fire wall , Do not confuse this hose with the A/C hose . In the yellow arrows indicates the hose and the route of the pressure hose . The red arrow shows you that this vehicle comes with a power steering pressure switch . SIDE NOTE - REMOVE THE POWER STEERING PRESSURE SWITCH FIRST FROM THE HOSE - IF YOU FEEL THAT YOU ARE GONNA BREAK THE SWITCH OR CANNOT NOT REMOVE THE SWITCH I RECOMMEND THAT YOU GO PURCHASE ONE FIRST - THIS IS A DEALERSHIP OR CAR QUEST PART - YOU CANNOT FIND THIS PART ON EBAY  - THIS IS A $80 PART .
 
Then you can remove the power steering hose metal line on the left from the hose then the two bolts that hold the bracket down that holds the hose .


Once you remove the power steering pressure switch ( NOT UNPLUG ) I mean the part then you can slide the hose over to the right then remove the green plug in the red arrow then the bracket that holds the power steering hose to a bracket in back of the motor .


Then you remove the passenger side tire and you will see where the bracket for the sway bar bushing above that will be the easiest way to remove the bottom bolt that holds the hose .
 
Once you remove that pull the hose from on top out .
 
Then you just in reverse put the hose back on , Top it off with power steering fluid .
 
 
I purchased the hose on eBay where the price was good and the fit was perfect , You might not have to use the bracket to hold the hose because of the protective cover from the heat .
 
Again make sure you can remove the power steering pressure switch .


.