Showing posts with label 코롤라 자동차 클럽. Show all posts

Monday, September 7, 2015

DIY Front Brakes & Rotors 05 -08 Corolla

This is a DIY for a 05 - 08 Toyota Corolla . This DIY will show you how to remove and replace front brakes and rotors .


There is two bolts holding the caliper , Once you remove the two bolts then with a flat head screw driver you pull the caliper forward , Once you remove the caliper again with a flat head screw driver you spread apart the front pads . 

It is important to replace hardware kit or at least lubricate the pins and the hardware before reinstalling pads .


To remove the rotors you need to remove the caliper bracket - There are two bolts on the inside that hold the bracket to the spindle - Clean and inspect studs because this is a opportunity to replace any of needed . Once you remove old rotor spray with brake cleaner the new rotor to remove and oil on it.


Before pushing the caliper piston back pull top up on the brake master cylinder reservoir - DO NOT REMOVE THE RESERVOIR CAP COMPLETELY OFF ONLY JUST POP IT AND REST IT ON THERE - BATTERY FLUID SHOULD NOT BE EXPOSED TO THE AIR FOR TO LONG IT CAN CAPTURE MOISTURE IN THE AIR AD BECOME CONTAMINATED .


Once you have done all the steps then apply anti seize to any of the bolts and reassemble .

No need for brake flush unless you opened the bleeder or if its time to bleed your brakes .

Close top of the reservoir check to see if fluid needs to be added . Pump brakes pryor to starting your vehicle until pedal comes up .


More DIY @ www.COROLLACARCLUB.proboards.com


.


Thursday, February 26, 2015

DIY Removing & Replacing Rear Struts 2000 Toyota Camry

This is a DIY for rear struts on a 2000 Toyota Camry


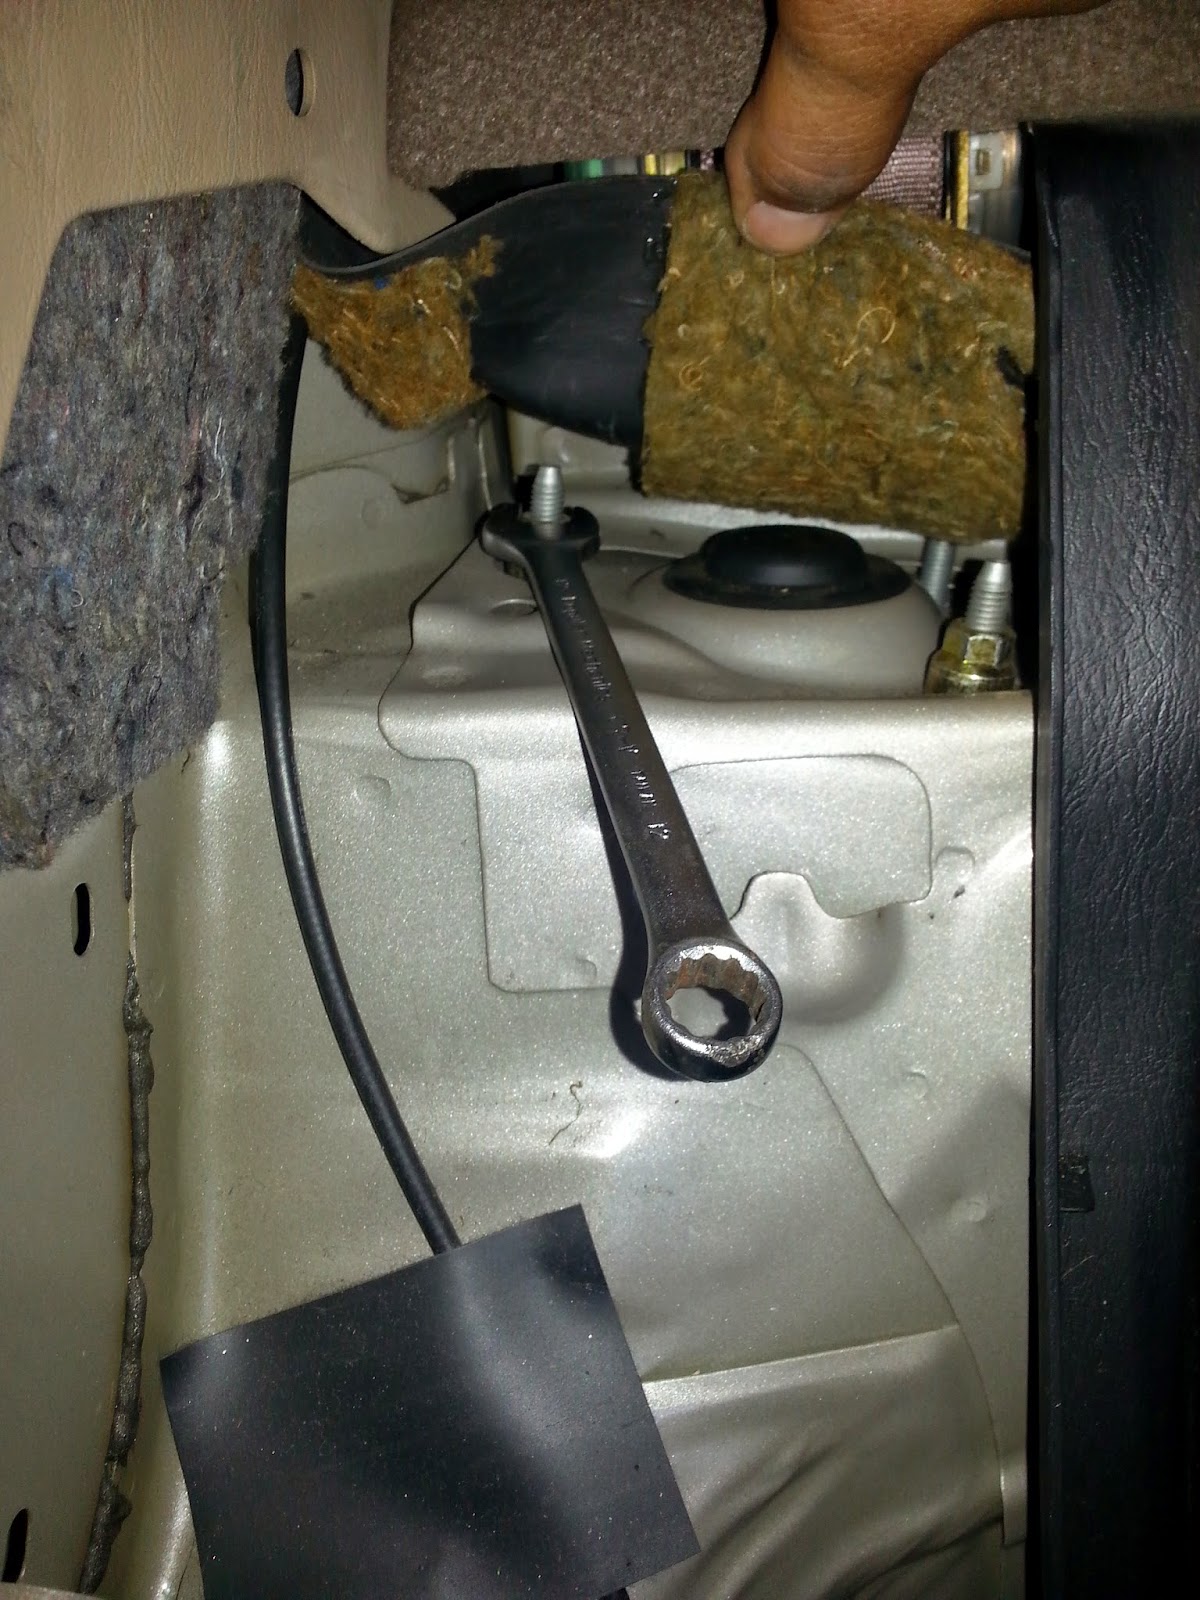
First you have to remove the bottom portion of the rear seat and then remove the side corners ONLY if you have fold down seats . If you DO NOT have fold down seats you have to remove the entire back seat . This is how you get to the rear strut mounts .


Remove the bolt for the brake line and the rear ABS wire .
 
 
Then from there you loosen the strut bottom bolts only removing the nuts


Then remove the rear sway bar links
 
 
Once you remove everything above in the photos either place the tire or a block and this is to prevent the rear drum to drop and ripping apart the ABS wire cause the drum will go to almost near the floor . One you secure that then you can remove the bolts that hold the bottom strut
 

 Then from there you can remove the top nuts for the strut mount and then the strut will drop on the support rear area .


What I found out about this DIY is that the rear springs aren't as difficult to remove with out a spring compressor tool . But if you don't feel safe use one . In my situation I didn't need one and when I put the spring on the new strut I hand pushed it down to put the top nut on .
 
Remember if using the old strut mounts that the painted point faces towards the direction as the bolts would go in on the bottom of the strut
 
In the last photo you will see a big fat spacer that needs to go on before the nut goes on the top of the strut .


 Once you have the spring secured on your new rear strut then you can reverse the way you took it off and start putting your struts back .
 
In my case I replaced the sway bar links .


.


Tuesday, February 10, 2015

DIY - Valve Cover Gasket Replacement Camry 00

This is a DIY on how to remove and replace a valve cover gasket for a 2000 Toyota Camry with a 2.2 motor .


First you remove the plug wires , If you aren't sure where they go mark your plugs wires , Then you move on to removing the pcv valve and hose , be real careful in this area if you feel like you need to replace these items then this is your chance , Then you remove the hose that connects to the air box .


Once you remove everything then you unscrew the flat nuts on top of the valve cover , This is a unusual place but I think this works a lot better then on some other vehicles , Once you remove the flat nut then you remove the rubber grommet washers that hold the valve cover centered , without removing those washers you cannot remove the valve cover . Then you can remove the cover upwards and start cleaning your cover or any oil that sits on the head .


It is important when you purchase your new valve covers they it comes with the washer grommets . DO NOT USE THE OLD ONES .


Once you have done everything you needed to do then you can put your cover back on , Not forgetting to put the washer grommets on and make sure you hand tight starting from the two center then the outer ones . If needed to make sure the washer grommets seat correctly use your other hand to help guide them as you hand tighten .

Once you hand tighten then you tighten lightly with a ratchet , DO NOT OVER TIGHTEN .


In this case I put a new pcv valve and grommet . Then you put everything back in order in reverse .

 
In about a week or two come back and check the flat nuts just in case the rubber gasket shrunk and hand tighten only .


.

Thursday, August 7, 2014

DIY Remove and Replace Radiator & Thermostat 98 - 02 Corolla


This is a DIY on how to remove a radiator and thermostat on a Corolla . First you drain out the radiator , then you remove the two bolts that hold the brackets to the radiator , then you remove the upper and lower hoses from there you disconnect if you have a automatic corolla the transmission lines . From there you lift up the radiator and remove it and sit the new one and the old one side by side . 


Once you put the fans on the new radiator then you remove the alternator where the thermostat will be .


As you can see this thermostat has been in this corolla since 1998 and has 350,000 miles on it , The reason this was replace because the radiator had shown signs of crack and that too has been in the vehicle since 1998 . So I did the maintenance and replaced both . As you can see the thermostat has slight rust because I DO NOT USE WATER I use radiator fluid with water wetter to lubricate the system . 


Once you put everything back together then you make sure you get all the bubbles out then add your water wetter . 


As you can see the water wetter keeps the car running cool 

More DIY at www.corollacarclub.proboards.com 


.

DIY 8th Gen Corolla Modification Stereo Install

In this DIY I will show you how you can use your stereo brackets on a 8th gen Corolla when your stereo doesnt have the holes in the side for them to be screwed on . plus with out using a stereo instal kit . Most stereos will screw in but others wont . 


Once you remove the face plate of your stereo make sure you dremel the opening so that the stereo can slide in and out with ease . Some stereos you don't need to do this but this MOD is for the ones that make it difficult . In this case this is a flip screen stereo so you need room for the stereo to open up and close . 


This part here takes some time cause you have to put the face plate back on and pull the stereo out and then measure how far it sticks out , Once you have made your measurements make sure you mark with a marker where the OEM brackets will be placed when installing the stereo . Then with the help of Plasti Proxy you apply some on each side and then place the brackets so that it will bond to the stereo , be careful with the openings you don't want the glue to go inside . 


Once the perma plastic dries then you install the stereo , still in test mode to make sure its the proper measurements and then test the flip mode as well . 


Then install the face plate for the stereo and then your DIY is completed . 

I find it that this plasti weld has come in handy for many things and bonds tight . 

More DIY www.corollacarclub.proboards.com 


.