Showing posts with label automatic transmission. Show all posts

Sunday, September 10, 2017

DIY Replacement Transmission Filter & Fluid 2000 Infiniti I30

This is a DIY on how to replace your transmission filter and your fluid on a 2000 Infiniti I30 

THIS IS NOT A TRANSMISSION FLUSH ONLY FILTER AND GASKET REPLACEMENT 


Make sure you match up the gasket to the transmission pan before attempting this - Best to count the bolts before buying your parts 


Personally I like to remove the dip stick so that air can travel down the tube and push out the old fluid since we aren't getting any of the fluid out of the torque converter 


Once fluid is removed from pan put the bolt back then loosen up the bolts starting from the front with a oil pan catcher underneath it - Then slide front of pan so if any more fluid will spill into the pan 


Then you can start removing the filter in my case I stuck the bolts in the new filter plastic so that you can remember which one they will go because there are different lengths 


While the transmission is still dripping you can start cleaning and removing and inspecting the pan for shave metal and clean magnet with Degreaser 


Match up your filter 


Unfortunate they discontinued the transmission fluid this vehicle takes and the Dexcron VI is the new compatible fluid 


Spray with brake cleaner on your transmission and clean the area around the gasket so that you have a oil less area 


Gently tighten the bolts up not squeezing out the gasket - Some people use the black gasket maker - Then in my case I added some Lucas transmission fluid to help out 


Run the engine then go through each gear - Then check fluid and re do the gears once more also check for leaks 

Then you are finished 


More info www.COROLLACARCLUB.PROBOARDS.com


,


Monday, June 1, 2015

DIY Driver Side Transmission Mount 2000 Honda CRV

This is a DIY for the driver side transmission mount for a 2002 Honda CRV 


This DIY you can either remove the air box or not but in my personal opinion its easier and more space to work with plus I was doing all of them and its easier to get to the back as well .


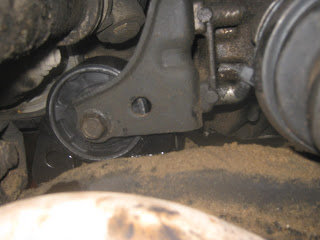
In this DIY I did remove all the bolts but only loosened the center bolt that goes through the transmission mount 


I wound up removing the bracket on the bottom again you can leave this on but it was more easier again to work with so I removed the bottom bracket as well .


Once I removed everything I put the center bolt back in the bracket so when I out everything back together it went smooth .


More DIY - www.COROLLACARCLUB.proboards.com 


.

Thursday, April 18, 2013

DIY 93-97 Rear Motor Mount Replacement


This is a DIY for the rear motor mount .


For this DIY you need to raise your corolla real high so that you have room to work underneath it . You do not need anything to hold the engine up . 


First remove the muffler pipe bracket . Then you remove the center bolt of the rear mount .


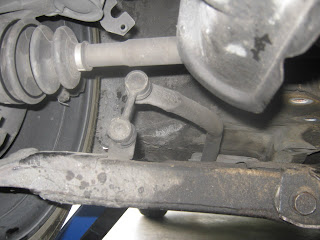
Then you can remove the bolts to the rear motor mount and remove the bolts for the sub frame but DO NOT REMOVE THE SWAY BAR LINKS OR BALL JOINTS
The purpose of removing the sub frame bolts is so that you can pull it down and remove the rear motor mount while the sub frame is still hanging .


Then once you remove the rear motor mount you go in reverse to put it back on . But you can start by putting the center bolt then push up on the sub frame and put all the bolts back .


.