Showing posts with label caliper bracket. Show all posts

Sunday, September 10, 2017

DIY Replacement Rear Brake Caliper 2000 Infiniti I30

This is a DIY for a 2000 Infiniti I30 driver side rear brake caliper replacement 


DO NOT REMOVE THE BRAKE HOSE AT THIS POINT - You first remove the emergency brake cable from the back then you can remove the brake caliper completely then lay it on the ground still connected to the brake hose .


Once you have the caliper off then you can which in my case I put new rear brake pads on the vehicle - Properly lubricating the parts and replacing the old parts with the brake caliper kit provided .


Then you can connect your brake hose to the caliper and the reason for this is because then your less likely to bleed the whole system by doing this you lose little brake fluid and you can just bleed what you replaced .


Connect emergency brake cable and then inspect the whole system 


Then you can bleed the caliper that you replaced - If you feel spongy then you bleed the whole system starting with the rear which is most farthest from the brake master cylinder 


more info www.COROLLACARCLUB.PROBOARDS.com


.

Wednesday, February 3, 2016

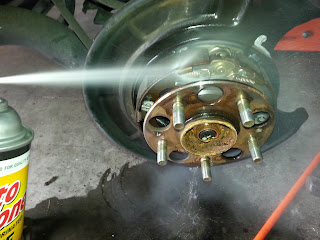
DIY Replace Rear Brakes and Rotors 2000 Honda CRV


This is a DIY for a 2000 Honda CRV rear brakes conversion to slotted rotors 


First you remove the rear brake caliper then you remove the brake caliper bracket 


With a screw driver you remove the two screws holding the rotor to the shaft 


Inspect and clean emergency brake shows that are located inside the rotor 


Replace all the hardware that is supplied - make sure slotted rotors are facing the correct direction - put everything back the same way you removed the old parts 


More DIY @ www.COROLLACARCLUB.proboards.com 


.

Wednesday, October 14, 2015

DIY - Front Brakes & Rotors 2000 Honda CRV

This is a DIY for a 2000 Honda CRV Front Brakes with Slotted Rotors


To remove the calipers you need to unscrew the top and bottom bolt - Then you will see a tension spring that if you did not purchase the hardware kit you will be using these again - The reason it is called a tension spring cause this is what pushes your front pads back as the caliper opens - These are important to reinstall 

Then with a 17mm socket you remove the caliper bracket so that you can remove the front rotor 


On this vehicle you have two screws holding the rotors to the hub 


Make sure you have the lines facing forward or read the sticker driver side and passenger side face different ways 


Only on the bolts you need to apply anti seize 


This vehicle takes ceramic pads 


With the caliper tool push the calipers back then starting putting everything on the same way you took it off 

When putting the caliper back on you will have to squeeze the pads to the rotors because the spring tensioner will push the pads out until the caliper surrounds the pads - What I did was slip the bottom of the caliper first then leave a opening to put the spring tensioner for the top then slide the rest of the caliper 


There you have it 


More DIY @ www.COROLLACARCLUB.proboards.com 


.